Steps To Replace Shower Head
Shower head is the most basic part of a shower system. It is the shower head that is responsible for sprinkling water on the persona standing beneath the shower. With the passage of time, it becomes necessary to replace old shower head with a newer one. There can be several possible reasons for replacing a shower head including wear-out performance, improper working and degraded looks.
 Upgrading to a shower head having additional features than the old one can also be a potential motive to replace the old shower head. Talking about the showerhead replacement process, most people think that it is a tedious process, but that’s not the case. In fact, it is easy to replace a shower head in a short time and without investing much of your effort in the process. Moreover, with the aid of proper instructions and guidance it becomes easy to replace a shower head. In this article, we’ll be discussing simple steps that can guide you to replace your shower head in a convenient way. With these steps, you will be able to replace your shower head all by yourself and doesn’t require the services of a professional to do the job for you. Regarding these steps, it is important that you follow these steps carefully to replace your shower head.
Uninstall old shower head
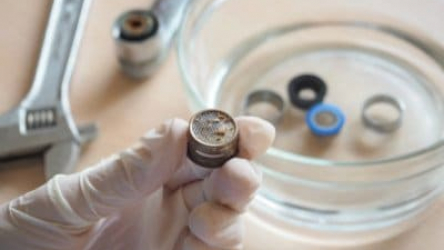
The first step in replacing your old shower head is to uninstall it carefully from the shower system. It is easy to detach the shower head from the shower pipe by utilizing simple tools such as wrench and pliers. The steps required to do so are as follows
- Find the shower arm, which is the pipe connecting the shower head to water pipe present in wall. Use your hands or a wrench to hold the shower pipe firmly so that it remains steady during the process.
- Loosen the nut on the shower head. The nut is generally found on the back of the shower head. You should use a plier for loosening the nut. After loosening, remove the nut from its place by turning it with your fingers in an anti-clockwise direction.
- Detach the shower head from its shower pipe using wrench or hands. Remember that you have to rotate it in an anti-clockwise direction.
Thread clean the shower arm
Cleaning the threads of the shower arm is necessary to ensure proper fitting of the new shower head unit. Threads generally have the traces of debris and plumber’s tape. You should clean the threads of the shower arm by following the simple steps mentioned below:
- Arrange a wire brush. The wire brush will help in cleaning threads.
- Threads are situated in front portion of the shower arm, where shower head is connected to it.
- Use the wire brush to clean threads of shower arm. Before proceeding further, ensure that there is no debris or residues of plumber’s tape on the threads.
Tap the threads on the shower arm
- Arrange a plumber’s tape roll. It usually comes in white and is readily available in the market.
- Wrap multiple layers of plumber’s tape around threads of the shower arm.
- Ensure that the plumber’s tape wrapped around threads is tight and secure.
- Do not leave any portion of the thread area uncovered because it can cause leakage of water.
Placing new shower head
 In this step, you have to connect new shower head with the shower arm of your shower.
- Use your hands to secure shower arm so that it does not moves and remains steady during the installation of the new shower head.
- By using your other hand, you have to connect the new shower head to the shower arm.
- Rotate the shower head 1 to 2 times in clockwise direction using your hand. This will temporarily attach the shower head with the shower arm.
- For tightening the shower head you have to use a wrench. Remember to rotate it in the clockwise direction for tightening.
- To protect your new shower head from wrench marks, you can apply a piece of cloth to the shower head.
- Ensure that the connection between the shower head and shower arm is tight.
- Remove piece of cloth from the shower head.
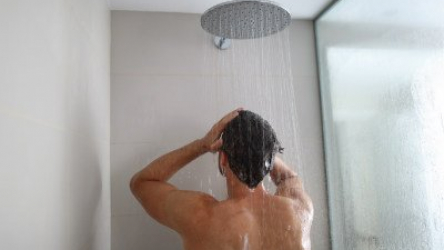
Testing new shower head
After completing the installation of shower head, it is necessary for you to check whether the new shower head is working properly or not.
- Run shower for a few minutes and observe any leakage of water.
- If leakage is found to occur, then you have to remove the shower head, re-tape threads and re-install it. Repeat the procedure until there are no leaks at all; otherwise approach a plumber to resolve the issue.
- It is also a good idea to check for leaks in pipe, which is present inside the wall. You can accomplish the task of leak detection by using a glass cup for listening leaks. If you find any leaks in the pipe within the wall, then you have to contact a professional.
Precautions
- Read each step carefully and follow instructions that are accompanied with your new shower head.
- While using plier and wrench be cautious, otherwise, you may hurt yourself.
- Always ensure that the connections are secure and tight.
- If you face any issues during the replacement of shower head, then consult a professional plumber.
- Always keep in mind that a connection loosens by turning it in an anti-clockwise direction while rotating it in the clockwise direction tightens the connection.
Summary
Replacing a shower head is a simple task. You have to simply detach the old shower head from the shower unit using wrench and pliers. Afterwards, you have to clean threads of the shower arm using wire brush, wrap plumber’s tape on threads and install the new shower head. The steps mentioned above are simple and will help you to accomplish the task of replacing your old shower head with a new shower head without any difficulty. However, if you are facing any problems related to the replacement of shower head or leakages, then you should seek for the advice of a professional.