
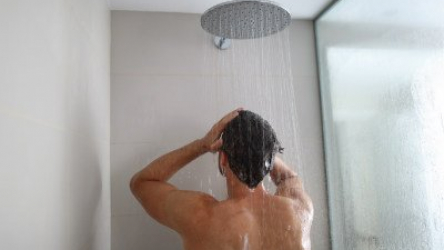
Guide To Fix A Leaking Shower Head
Table of Content show
It is a common thing to end up with a leaking shower head. The leakage in your shower head causes wastage of water, which is not good. You don’t need to hire a professional to fix the leakage because you can do it yourself by following some easy steps. Additionally, fixing a leakage yourself saves money that you have to spend in order to hire a professional.
There are 4 methods for fixing a leakage in the shower head and each of them are mentioned in the following section.
 Method-1: Unclogging Holes of the Shower Head
 Method-1: Unclogging Holes of the Shower Head
- Clogging of holes of a shower head is common and occurs due to the build-up of lime and other mineral deposits that are present in water. Unclogging a shower head holes is simple and you should try it when you do not know the exact problem causing the leakage.
- First, you have to switch off the water supply to your bathroom. Either shut off the water supply of the bathroom or turn off the main water line.
- Remove the faceplate of the shower head by unscrewing it. If you are unable to remove the faceplate, then you should remove the shower head itself from the fixture.
- Arrange a container capable of holding faceplate or shower head. Pour white vinegar in the container sufficient enough to completely immerse the faceplate or the shower head.
- Let the faceplate or shower head stay put in the white vinegar for 8 hours. White vinegar will dissolve mineral deposits and lime in it.
- Remove the faceplate or the showerhead from the solution and clean the holes manually by utilizing a toothpick or nail. Use a stiff plastic brush to scrub and remove the traces of debris.
- Attach the faceplate or shower head to the fixture and turn on the water supply. Check for leaks, if leakage persists then you should try the other method.
Method-2: Replace a worn rubber washer
- A worn out rubber washer can be a cause for the leakage of your shower head. Rubber washer also known as the O ring, starts to crack with the passage of time. The cracks are responsible for water leakage through them. Replacing a worn rubber washer with a new one will solve the leakage problem.
- Turn off the water supply of the bathroom. Remember that for a compression faucet, you have to determine whether the leakage is from hot-water valve or from cold-water valve.
- If you have a single-handle faucet, then you have to replace the rubber washer present inside the shower head. While for a two-handle faucet or compression faucet, rubber washer present inside the faucet needs to be replaced.
- For replacing the rubber washer of your shower head, you have to detach the shower head from the shower pipe. You can use a wrench to loosen the collar nut that shuts tight the shower head with the shower pipe. The rubber washer is present beneath the swivel ball of the shower head. Pull off the old rubber washer and replace it with a new one.
- For replacing the rubber washer present in the faucet, you have to unscrew and disassemble the faucet. When you remove the screw, you have to pull the faucet handle with your hands or with a faucet puller. After removing the handle, you will need to remove trim and sleeve covering the faucet stem. Unscrew the hex nut holding faucet stem by utilizing a deep socket. Finally, you will be able to replace the rubber washer present inside the faucet.
- Reassemble everything and turn on the water supply to check whether the leakage is eliminated or not.
Method-3: Replace or Clean a Malfunctioning Diverter Valve
- A diverter valve is responsible for switching water supply from bathtub faucet to shower head. Leakage from shower head can be due to the malfunctioning of the diverter valve, which may be due to weakening of components or sue to build up of sediments. You can either replace the diverter valve or clean it to solve the water leakage problem.
- To start with, first you need to do is to turn off the water supply.
- For accessing the diverter valve, you have to remove the faucet handle by unscrewing it. The screw is either exposed or present beneath a cap. You can use a pocketknife to remove the cap to expose the hidden screw.
- Take out the diverter valve by unscrewing the hex nut present on the faucet stem. If you find it difficult to separate out the diverter valve, then you should wrap a vinegar soaked piece of cloth around it for some time to get rid of lime scale.
- Check the diverter valve, if it has cracks then replace it with a new one. Otherwise, use a wire brush and white vinegar to clean it thoroughly to remove sediment build up.
- Reassemble all the assembly parts and turn on the water supply to check if the leakage of shower head is resolved or not.
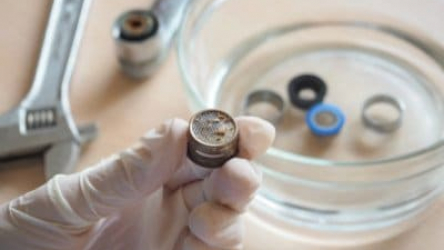
Method-4: Replace Malfunctioning Cartridge Valve
 Method-4: Replace Malfunctioning Cartridge Valve
- A malfunctioning cartridge can be responsible for the leakage in shower head utilizing a one-handle faucet. Replacing malfunctioning cartridge may solve the problem. To start with the replacing process, first turn off the water supply.
- Pull of the faucet handle by loosening and removing the screw present on it or beneath its cap. You can use a handle puller to pull off the handle. After removing the handle, you have to remove the handle washer by unscrewing cartridge retaining clip. You will be able to locate the cartridge stem after removing handle washer.
- Different methods are required to remove the cartridge that varies with manufacturers. In general, you have to unscrew hex nut covering the cartridge stem. Use pliers to remove the cartridge stem and replace it with a new one.
- Reassemble all the parts of the faucet. Ensure that everything is in its place. Run water through the shower head to check whether leakage problem is solved or not.


I’m stuck at “remove the handle” stage, because the tiny set screw at the bottom of the handle is stuck in place from the minerals in the water. I’m afraid that removing the screw will take such force I will need to buy a whole new faucet (not that the foucet mfg would mind that).
Use lemon juice or vinegar and that will eat away all the minerals that might build up there…